DJI Phantom 2 FPV Setup With Zenmuse Gimbal
We have received quite a few requests from you guys about how to set up an FPV system on quadcopters. Our previous content covers many aspects of FPV such as FPV System Basics including goggles, glasses and frequencies as well as setup and safety, but many of you missed a real step by step guide that includes the soldering bit and how to physically get the darn thing connected to the quad.
So we’ve asked our writer Mark Richardson to help you out on this one because he installed several of them on his bird and uses a Fat Shark Predator which he is really satisfied with. He also has a great course on Udemy called Aerial Photography and Videography with Droneswhich happens to cover the subject more broadly. Look towards the end of this article for a special treat only available to Dronethusiast.com readers!
We’ve selected one of the most popular platforms, the DJI Phantom 2 which does not have a pre-installed gimbal like the Vision or Vision+.
DJI Phantom 2 FPV Setup With Zenmuse Gimbal
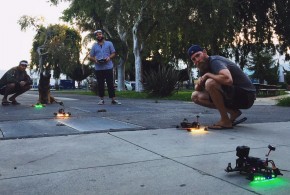
A video downlink system that gives you a view through the camera on your multi rotor is especially useful trying to frame a shot for photography or videography.
There are several different options for setting up first person view or FPV on your multirotor.
If you opt for the Phantom 2 with Zenmuse gimbal like I suggest, you will have to purchase a third party video transmitter and receiver.
Some people prefer to use a battery powered LCD monitor. This setup can be nice because it allows the operator to glance down at the screen for the FPV view or look up and view the quadcopter for situational awareness.
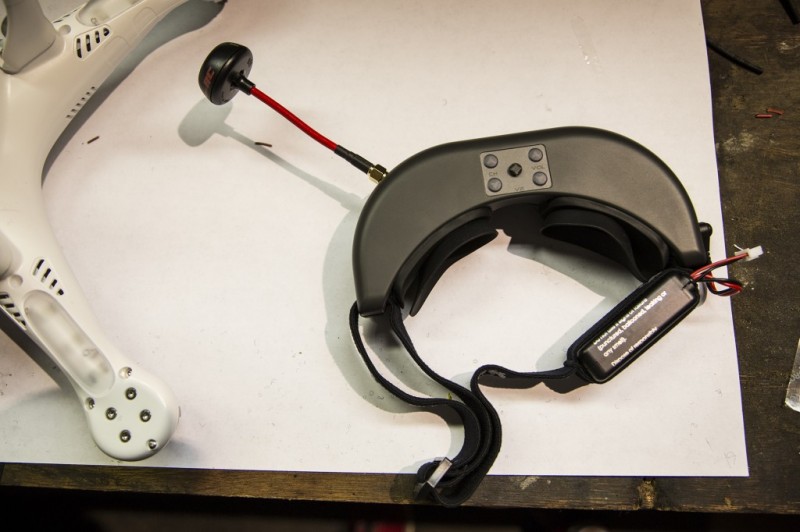
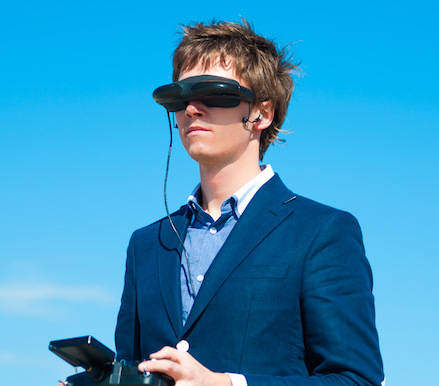
The system I use and recommend is from a company called Fat Shark RC Vision Systems, I use the Predator in particular. I like the portability of this system. You attach the transmitter to your Phantom and connect the four wires to four wires on the transmitter. The transmitter will then receive a video signal from the go pro and transmit it to your video receiver.
The receiver is a battery powered goggle system. I’ve hooked up this pair of fat shark goggles up to a television so you can have an idea of how it works (see in the video below). This is a quick demonstration of what you will be able to achieve with the DJI Phantom 2 FPV Setup:
Click here to sign up for Mark’s course on Udemy called Aerial “Photography and Videography with Drones” for $20 off, so you can enroll for just 79$ instead of the regular $99!
If you don’t want to sign up for the course, please go ahead and use the step by step guide below.
The Phantom 2 quadcopter is an excellent platform for those looking to get started in aerial video or photography. The Zenmuse H3-3D three axis gimbal and a companion GoPro 3 provide ultra-smooth visuals. With the addition of a small video transmitter, the user can have a real-time birds eye view through a pair of First Person View goggles (FPV).
Setting up the Phantom 2, Zenmuse gimbal, and FPV transmitter is relatively straight forward but will require some ability with electronics. This particular setup will require a small amount of soldering.
Besides a soldering iron, you will also need the following items and tools:
- Mini screw driver set
- Wire strippers
- Wire cutters
- Shrink tubing or electrical tape
- Allen wrench (The one supplied with your Phantom 2)
DJI Phantom 2 FPV Setup, Step-by-Step Guide
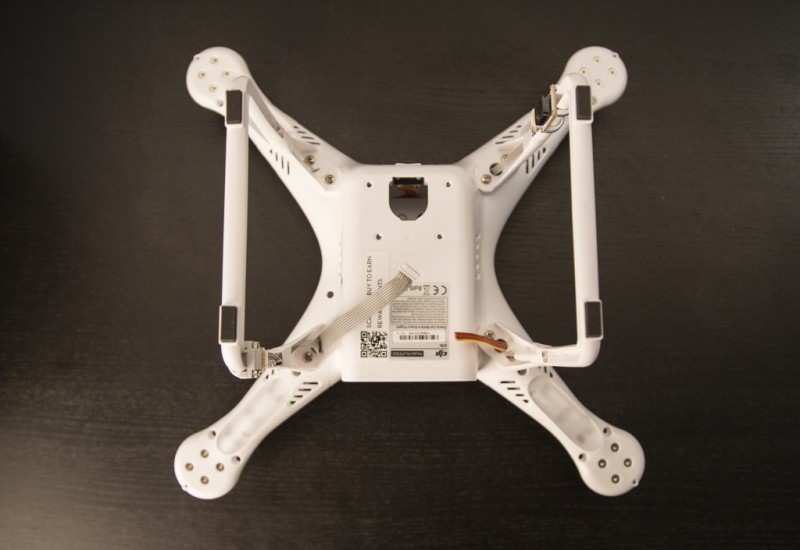
Step One – Remove the Top Shell
Remove the top shell by removing the one small screw and three hex screws from each of the four phantom legs. Make sure to set aside in a safe place. Once you’ve removed all of the screws, carefully separate the top shell from the body. Note that the top shell contains the Phantom’s GPS antennae and it is connected to the body with a cable and connector. Gently pull on this connector to detach the cable from the body and the top shell will come free.
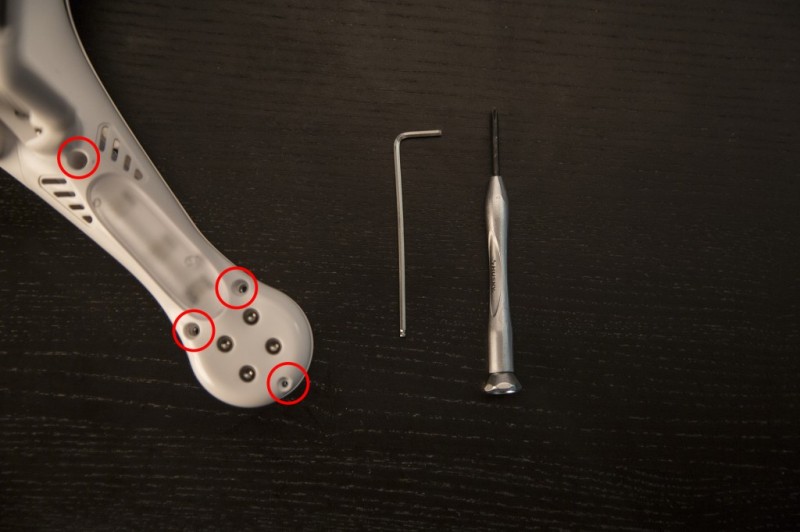
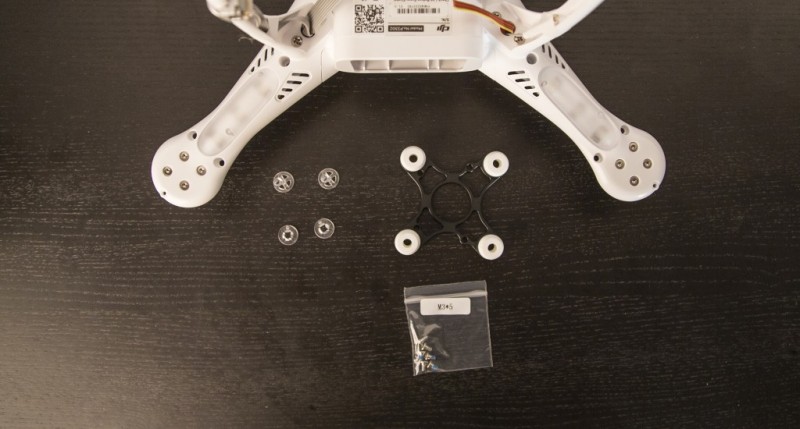
Step Two – Mount the Filter Board Retrofit
At the time of this writing, the Zenmuse H3-3D gimbal ships with a small filter circuit board that is designed to remove interference from the video feed from the gimbal used for FPV. This seems to be a retrofit from DJI. Locate the Two Screws on the main board of your Phantom 2 indicated with red circles on the image below:
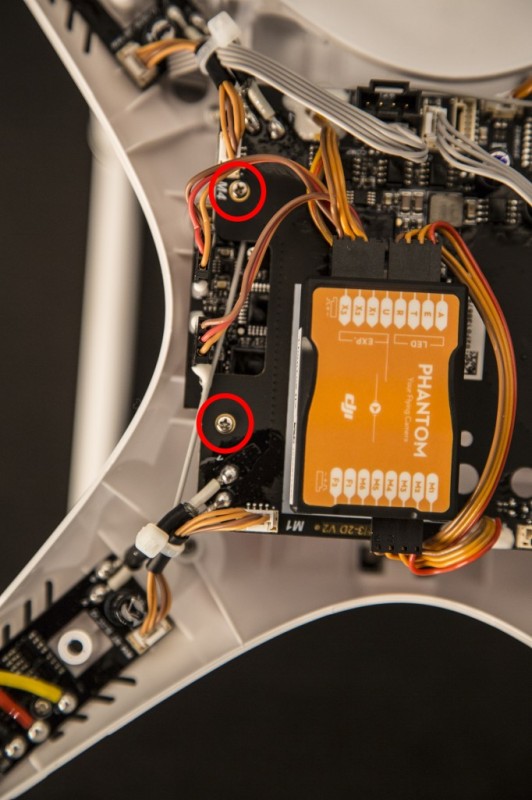
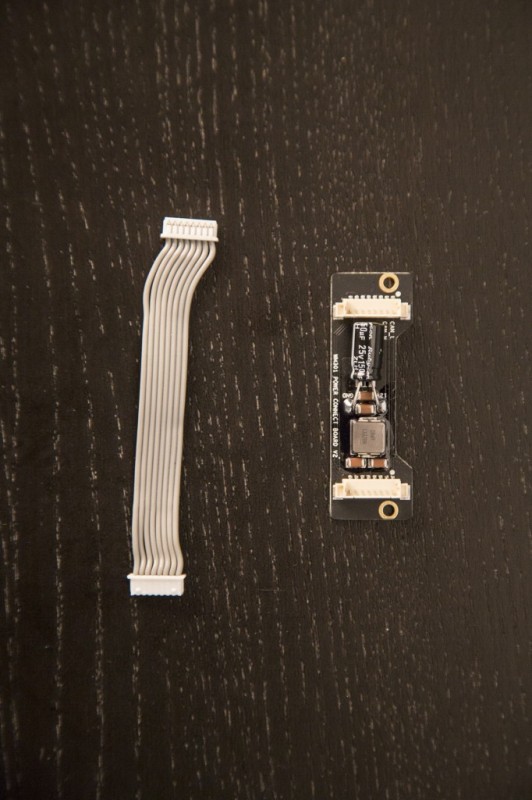
Remove the two screws from the main board and use them to mount the filter board onto the main board.


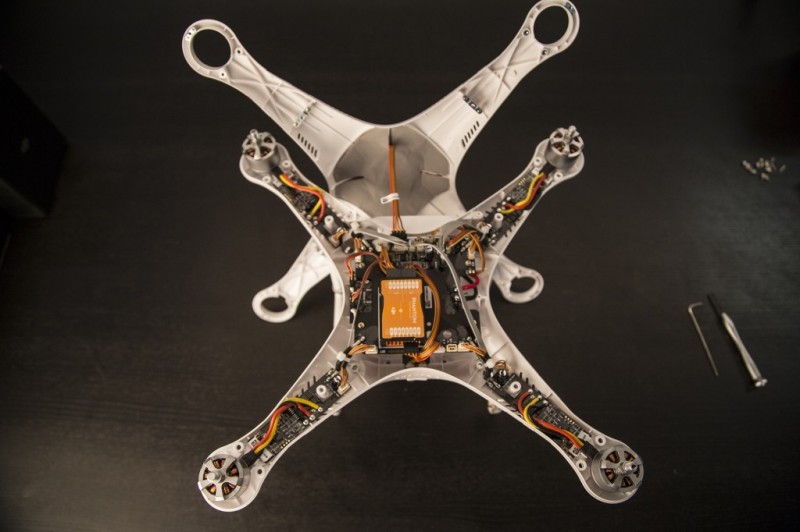
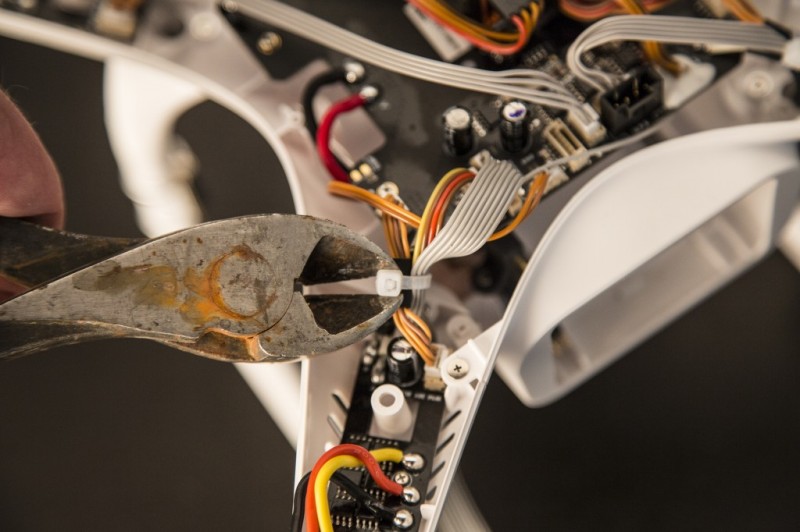
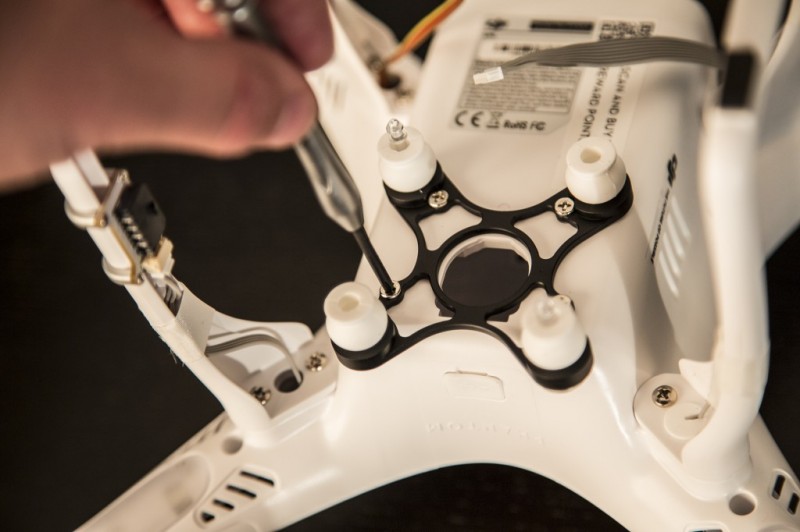
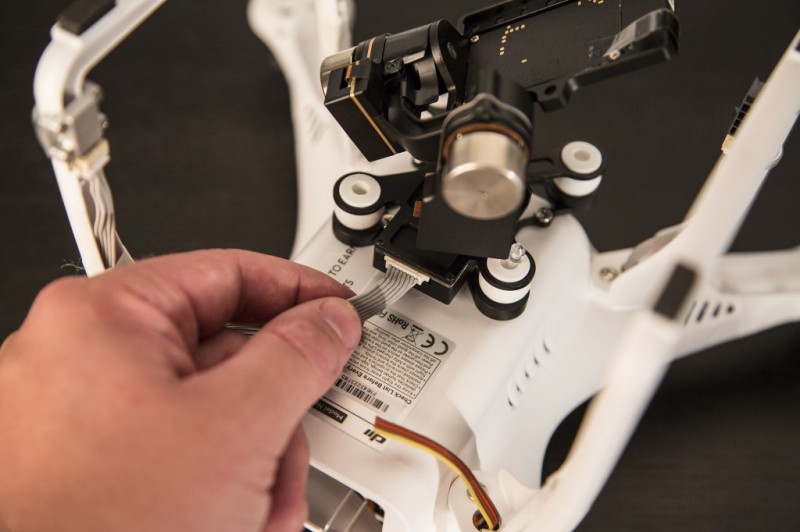
Step Three – Reroute the Zenmuse Ribbon Cable
You will now need to unplug the gimbal cable and reroute it to the opposite side of the Phantom 2 so that it can plug into one end of the filter board. Carefully use a pair of cutters to clip the zip tie that holds the bundle of wires containing the gimbal cable.
Gently unplug the gimbal cable from the Phantom’s main board noting where the cable connects as you will need to connect the provided short ribbon cable here in the next step. The word “Zenmuse” is printed small next to this connector on the main board.
With the gimbal cable disconnected from the main board, gently work it out of the hole in the Phantom’s leg. Once it’s free, work it back up into the Phantom through the hole on the opposite leg. Connect one end of the cable to the far end of the filter board.
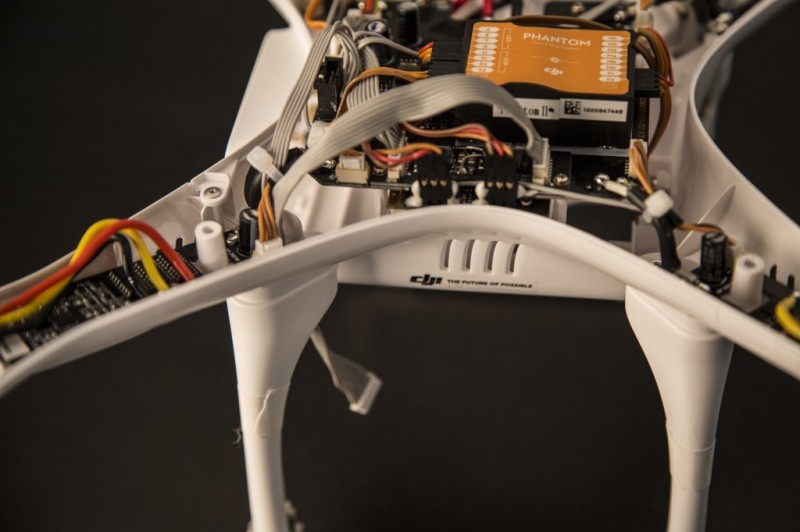
Use the supplied short ribbon cable to connect the other end of the filter board to the Zenmuse port on the Phantom’s main board. It’s a tight fit, but the cable will just barely reach if you route it under some of the existing wires.
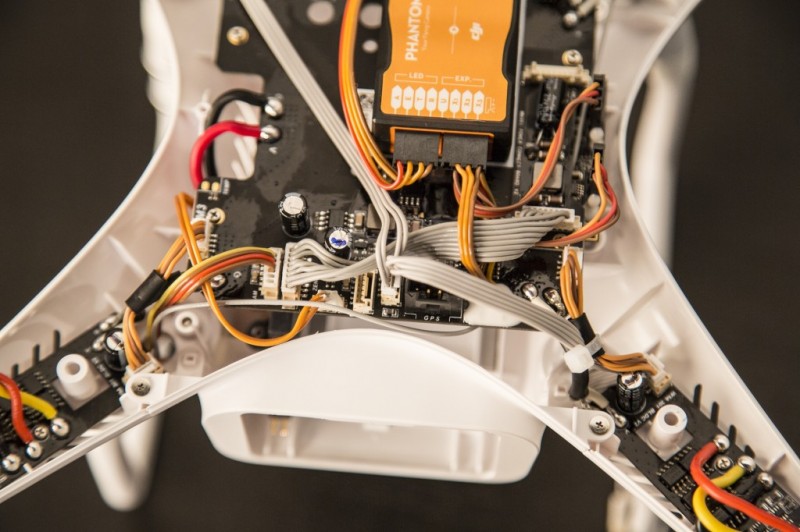
The bottom of your Phantom should now look like the image below with your gimbal cable rerouted to the other side. The other ribbon cable with four colored wires is the video and power supply that you will connect to your FPV video transmitter.
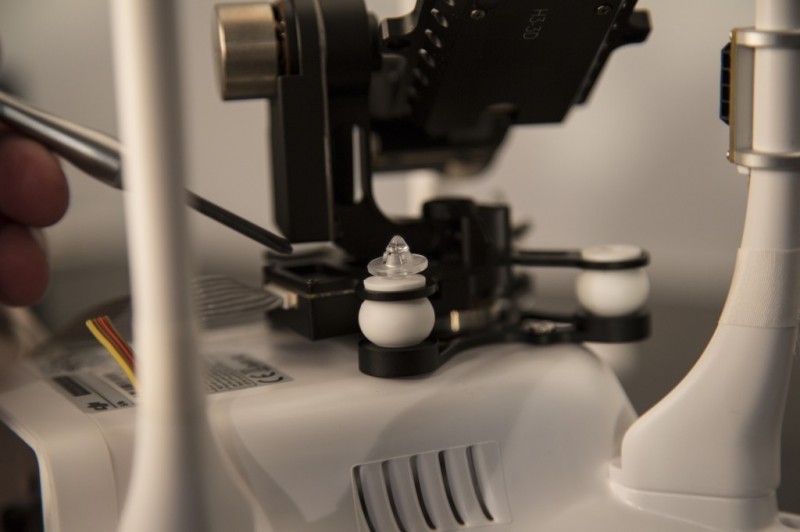
Step Four – Mount the Gimbal
The base of the gimbal should come with four white vibration dampening balls already installed. Locate this along with two of the supplied plastic retaining pins and fasteners. You will also need the supplied M3 X 5 screws to attach the base of the gimbal to the bottom of your Phantom 2.
Place the two plastic retaining pins through opposite sides of the gimbal base. These should should sit freely inside of the white rubber vibration dampeners. Secure the base of the gimbal to the underside of the Phantom with the supplied screws.
Attach the gimbal to the white rubber vibration dampeners by pinching the dampeners and working them into the holes in the gimbal.
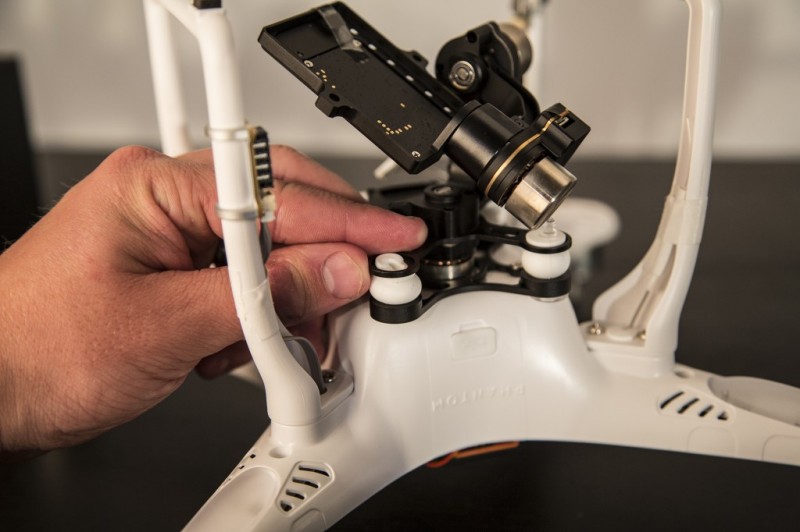
Attach the gimbal cable to the back of the gimbal and press the plastic fasteners onto the plastic retaining pins. Be careful to press the fasteners only to the first notch. The white rubber dampeners should not be compressed by the retaining pins.
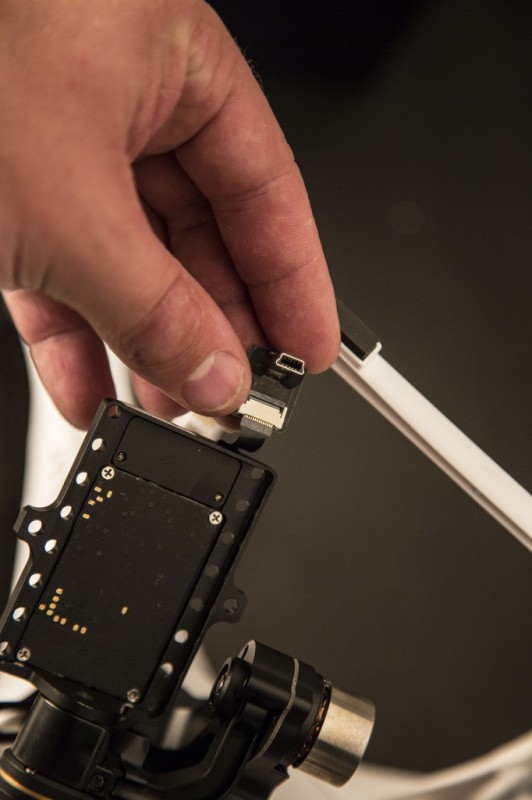
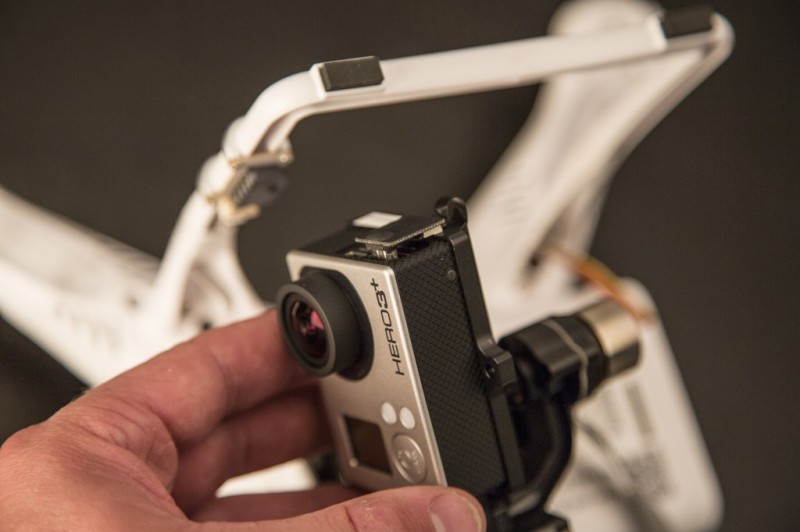
Attach the USB GoPro video connector to the ribbon cable on the gimbal. Place a GoPro 3 into the gimbal, connect the USB video adapter and secure the GoPro with supplied bracket and screws.
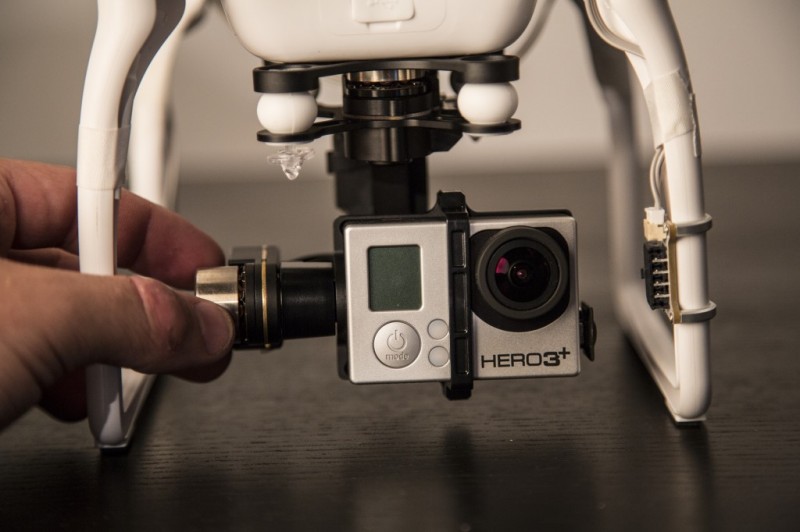
Step Five – Attach FPV Video Transmitter
This guide shows how to hook up a Fat Shark video transmitter specifically, but the steps would be similar regardless of the FPV system you choose to use.
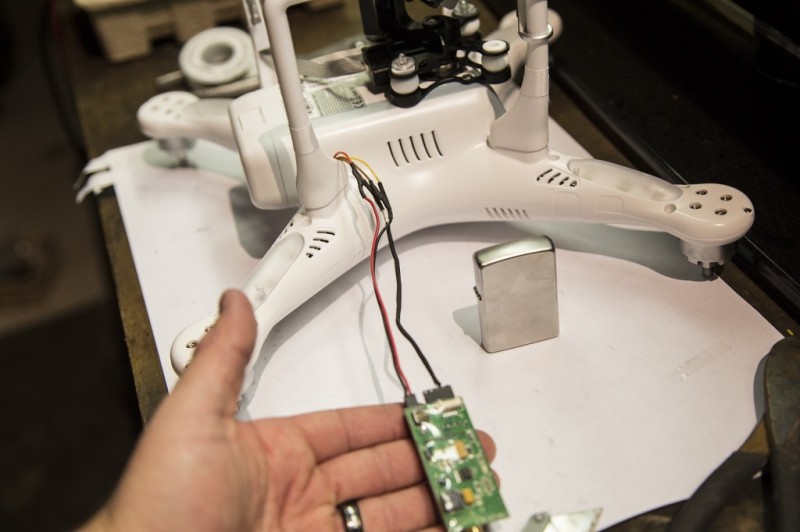
Strip the four wires that make up the FPV ribbon cable.
Yellow = Video Out Signal
Brown = Video Ground
Red = Power
Brown = Ground
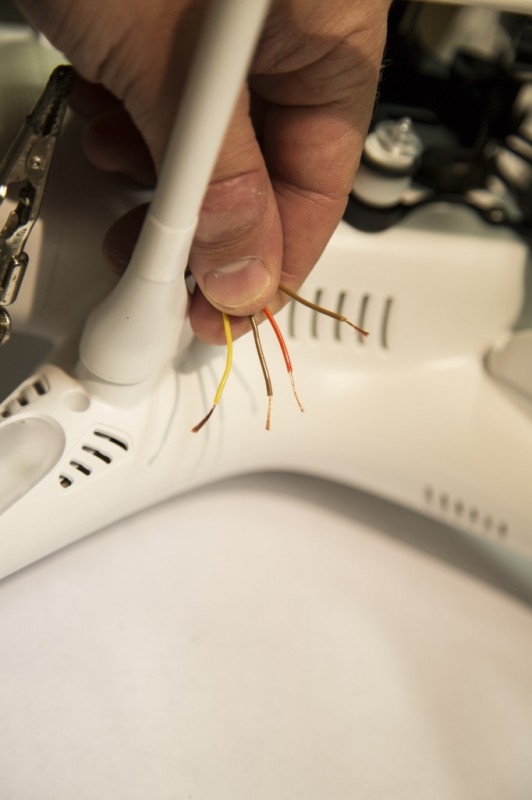
If the model of fat shark you have has a red 5 volt power wire next to the video signal wire, this will not be needed. I clip this wire near the connector. Strip the insulation off the remaining white (video signal) and ground wire and a small amount off of the red and black power wires.
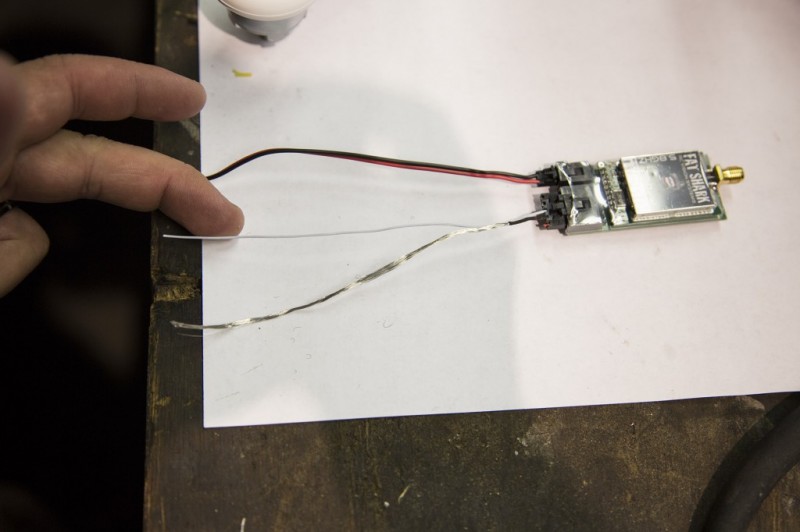
Solder the four wires to the corresponding wires on the Phantom 2 taking care to double check your connections. Wrap your connections with electrical tape or shrink tube.
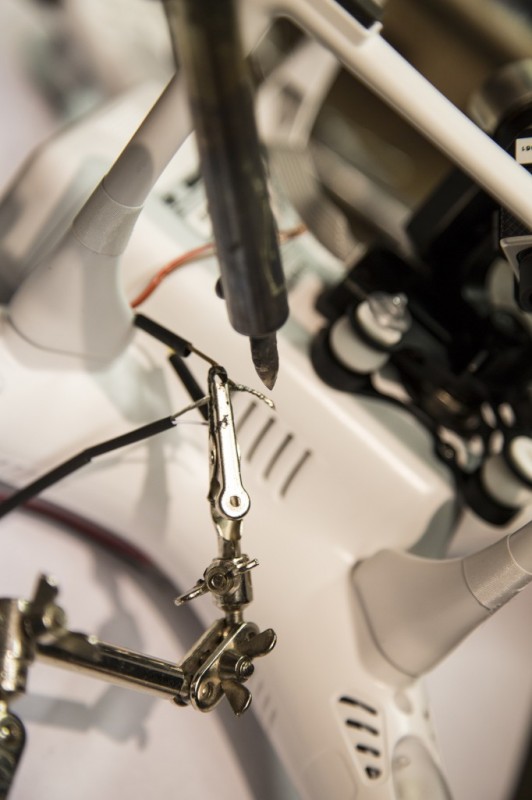
Secure the video transmitter to the underside of the Phantom 2 with velcro and zip tie or tape the wires in place as needed.
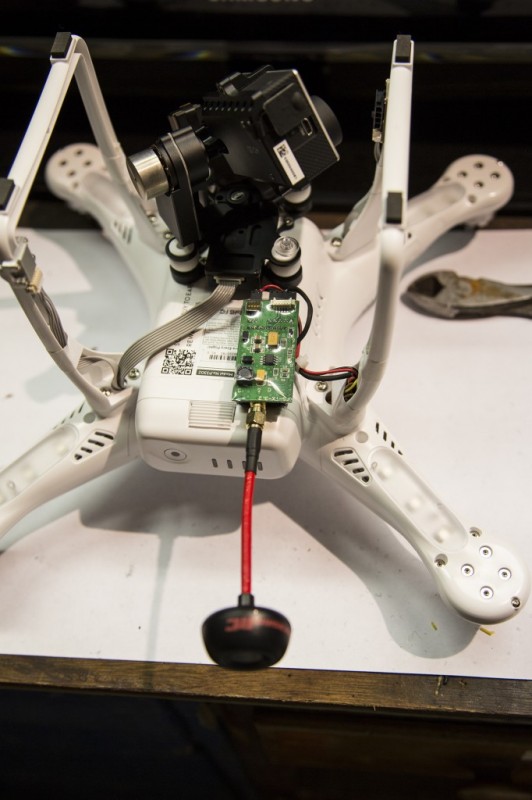
Attach the video transmitter antennae, power on your FPV goggles or display, turn on the GoPro, and then power on the Phantom 2 to test the gimbal and video Transmitter. I recommend doing a basic and advanced IMU calibration in the DJI assistant software before flying the Phantom with your new gimbal and Video transmitter attached. Also, remember to do a compass calibration before your first flight!
Hope this quick DJI Phantom 2 FPV Setup guide will come in handy when you decide to go ahead and give this great experience a shot. If you have already tried FPV with a simple screen or tablet, you already have a hang of it, but doing it with fully immersive goggles will take you to a whole new world.
Good luck and happy flying!
Kennedy Martinez
kennedy@dronethusiast.comKennedy Martinez is a resident writer who joined Dronethusiast at the beginning of 2019. She has years of experience reviewing drones and other tech products. When it comes to flying drones, Kennedy loves the ability to create artistic videos from a unique point of view. Kennedy enjoys researching new drones and other exciting products that are available to consumers which is why she is committed to creating the best buyer's guides for our readers.