5 Drone Photography Tricks That Make Me $200 per Hour!!
Last time we talked about the approach for handing out awesome shots to Marketing and PR Agencies (which are more consistent and always preferred) as freebies to encourage a response and a conversation, instead of emailing to nag for free contact connections.
We also mentioned that this is dramatically easier to gain attention and a following with vs. posting your non-relevant business/service/product onto instagram hoping to get attention from bots or people who don’t care.
I mentioned before that I charge $200/hr for Aerial Photography and I only get calls from people who want to pay those prices because of the type of work that I do. I’m not your ‘pay me some money and I’ll just send some photos to you and say bye’ kind of photographer. This is what gets me calls back, references, and lots of people willing to pay those rates because they know what to look for in them.
1. SHOOT. IN. RAW.
This is a clear and resounding priority to any photographer who is charging. I don’t know any photographers who would even buy a camera that didn’t shoot in the RAW format. If you don’t know, it’s a picture format that soaks in data in the purest form it can and leaves it unedited. Versus JPEG which is the standard format and stamps your data into a pre-decided set of color, brightness, clarity, etc.
Imagine JPEG as having a lunch box to pack your favorite things from out of your fridge to take to work. It’s easy to carry around and deliver, but man you don’t have very much room in there to decide what to carry.
RAW is like bringing the fridge, then deciding at lunch which things you want to fit onto your plate.
Okay maybe I’m exaggerating haha! No. No, I’m not:
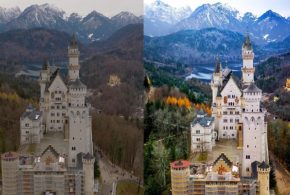
The left is the original JPEG from the camera. The right is the edited RAW where I decided which colors to keep, brighten, highlight, etc. Notice there’s no pesky humans in the second photo? You can adjust that too.
There is no competition between these two. However, when you shoot RAW format, you have to then edit the image file on a computer to decide on which settings to fix into something beautiful and rich. Software isn’t expensive at all, I pay $10 a month and it is 10000x worth it because of all the mistakes I can fix from a shoot, like those tourists walking around, and it’s REALLY easy.
2. Shoot Panorama.

Why is this such a big deal? Two reasons.
One, because when you shoot with a short lens on these drones, you have to get everything inside the frame in your little square which means you have to back way up away from your subject and you don’t get to see the depth as much.
But if you set your drone to shoot panorama (usually I do a nine photo stack) you can seriously be 10 feet away from a roof of a building. The drone will then shoot down and up and left and right, compile the photos into a folder, and then you decide in the software, Adobe Lightroom, if you want to use all of it, part of it, just the good sections you like or whatever.
The second massive reason I do this is because shooting with one photo gives you 20 megapixels with a Mavic 2 Pro, but if you shoot a panorama you are combining nine of those photos so it’s around 180 megapixels. That is WAY more data to work with and way more sensitivity when you’re shooting in low light. It just makes your drone look like it’s from the future.
There is something you have to be really careful with. These photos stacked together can be difficult on the software and the computer will work hard to edit them, so hopefully you have a new one because even with my computer it sometimes gets bogged down and you need to be patient.
I show you how to do this later on with previews, but that’s another section. However, it is still worth it because the appeal you can pull from doing this is much more dramatic and I love deciding later if I only want to use three of the photos, all of the photos together, or just looking at it all at once and then making a decision after.
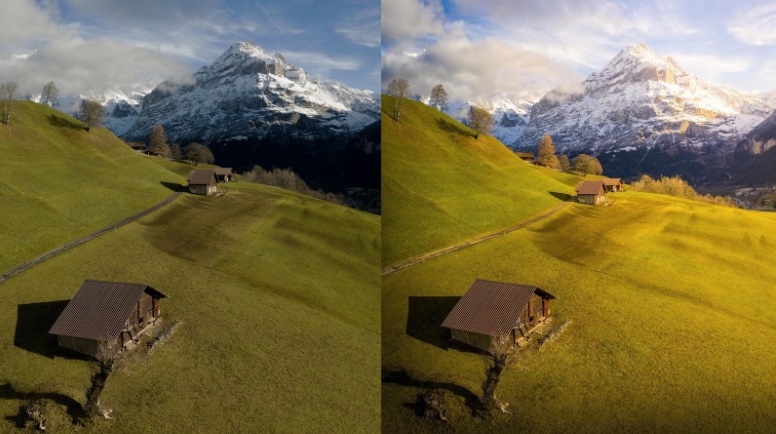
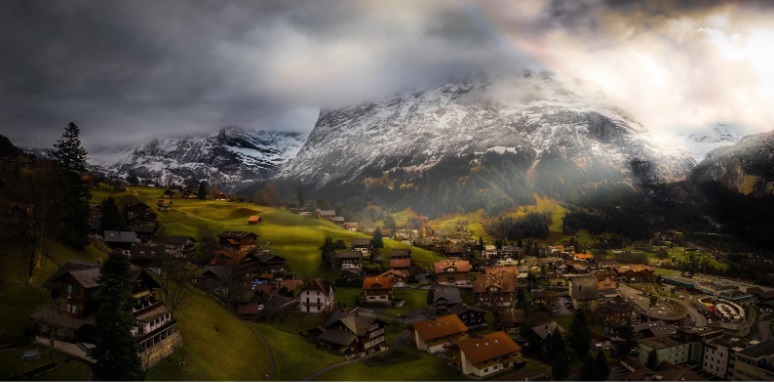
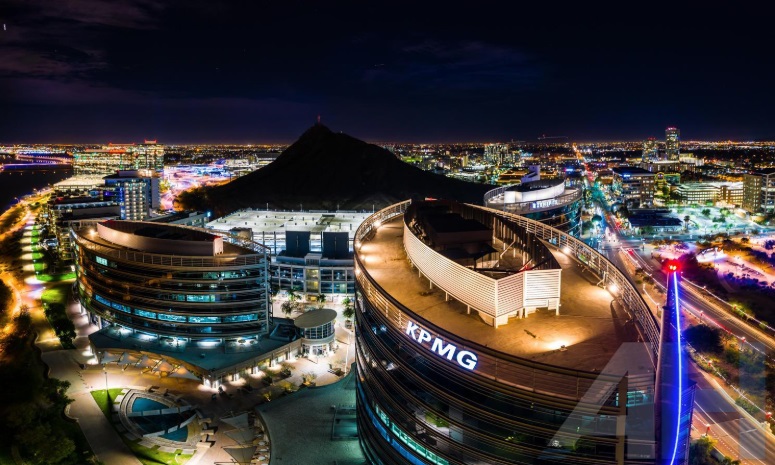
3. Don’t shoot things shoot CONDITIONS.
I used to decide “I want a photo of that mountain,” and I would go there, no matter what day, take the shot and after edits that would be the end of it. Lame. Weak. Don’t do this.
NOW I will check the weather for visibility. A day with 10 miles of visibility is good. You want to be able to see the fall off to the horizon and the city in the distance without a layer of fog or pollution.
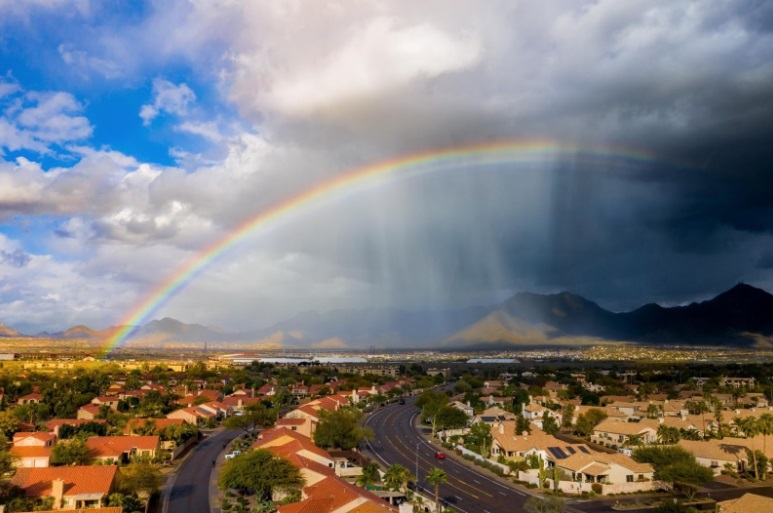
If I’m shooting a mountain, I’ll wait for a day when there’s clouds hanging over the face because the changes in the lighting from the fog will make an awesome shot once it has all been edited.
I won’t just shoot a sunset, I’ll wait for a vivid pink one with feathery clouds all over because the texture of those look really nice in Lightroom when you play with the clarity and color balance.
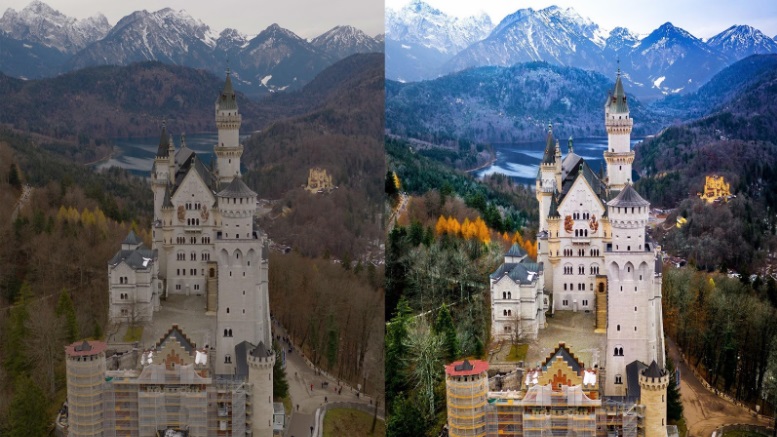
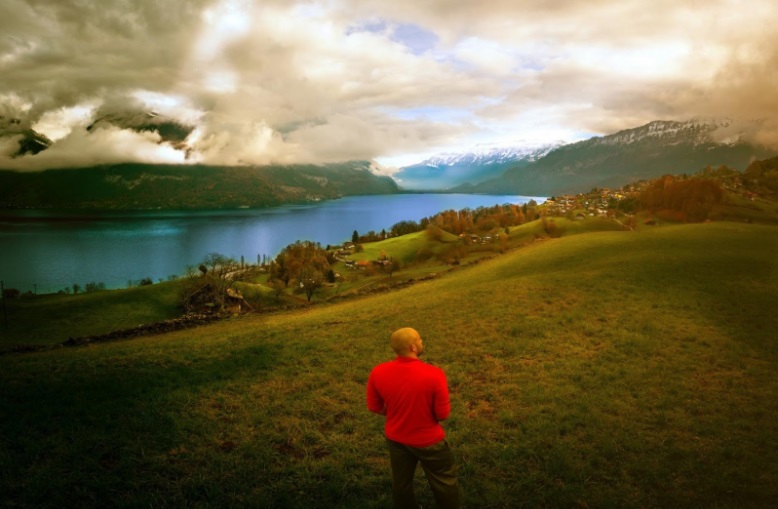
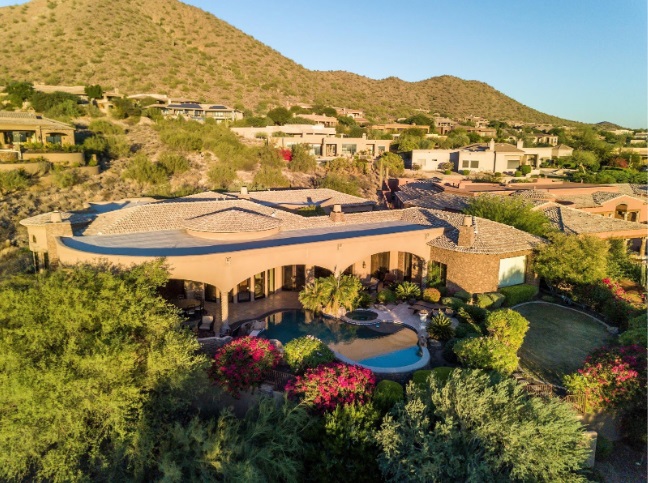
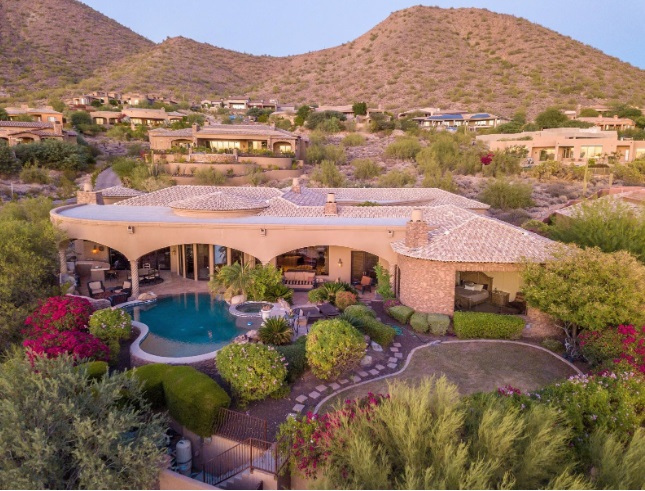
Get Closer.
I can’t believe this is so common, but everybody assumes because their drone can fly high and far away, it MUST be high and far away or nobody will know they have this awesome toy.
All my best photos are within 20 feet of a subject. I barely ever get far away unless there’s a reason. These drones all have short lenses, and in landscape photography you want to have something in the foreground to show off how far the view is or the mountains in the distance. Treat your drone like its a camera on a really long poll, fill up the frame, and shoot panorama to get those really awesome deep shots where you feel how high or tall a building is.
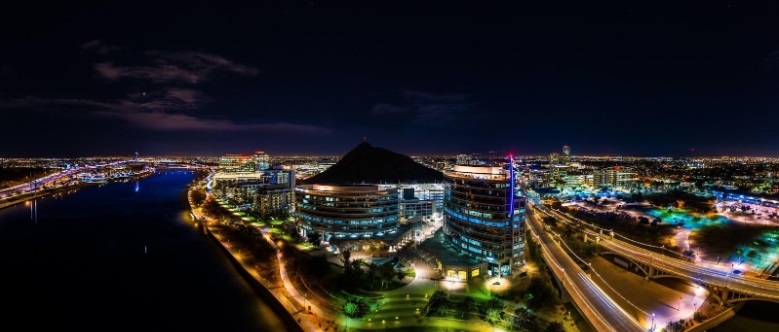
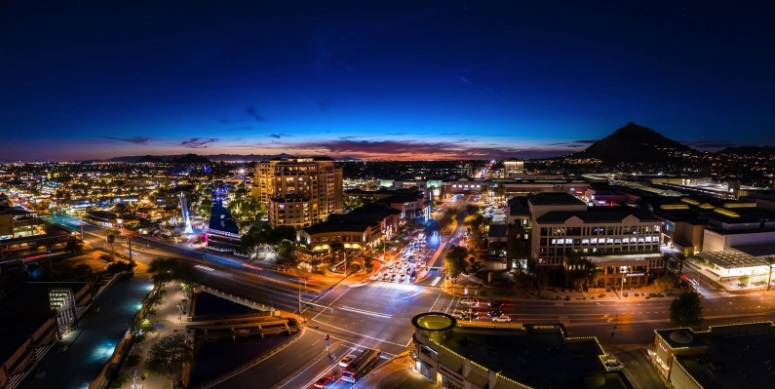
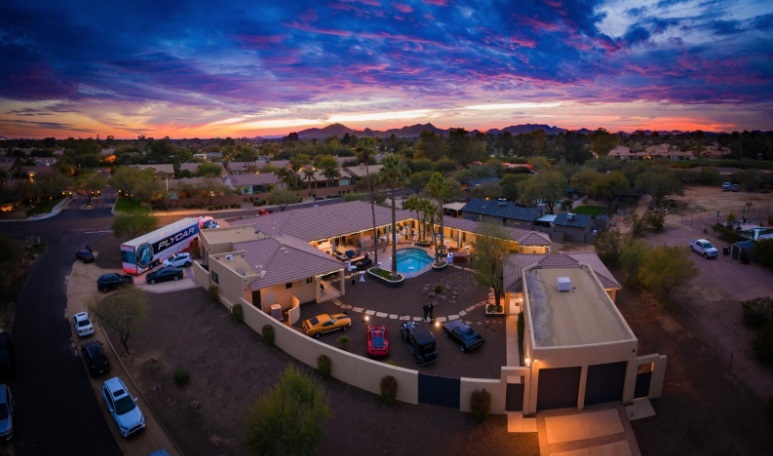
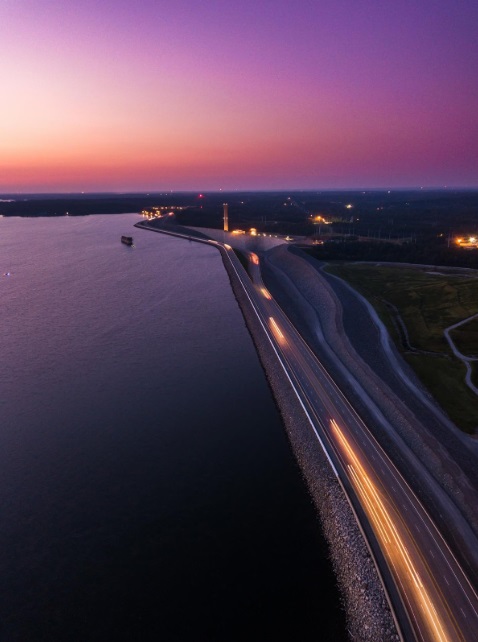
5. Shoot right at sunset if you want even light.
Almost all real estate shots I see are at 2pm on a sunny day. This is fine, you can’t always time it right, but for something like a resort or commercial building, you absolutely better make sure the entire thing is evenly lit and nothing has harsh ugly shadows across it.
Aim for RIGHT when the sun hits the horizon, you will get this soft even pink across the entire building and the camera sensor will have a much easier time capturing the brights and shadows and leveling them out, compared to shooting midday, which puts your camera in lighting extremes and the contrast between the shadows beneath trees and the white reflected roof on a building is just too much. Even shooting with Raw. You will be much happier with a sunset shot even if the sunset isn’t in the picture.
Don’t worry about lowering the shutter to capture more light, these drones can slow down all the way to 2.5 seconds (DJI) and still get sharp images. DJI has phenomenal gimbals, even if all the cameras aren’t great. This even works on a Phantom 3 or Mavic 1, so you don’t have to have the newest, priciest drone to compete, which I talk about a lot in my course as well and have a million examples.
And of course, RAW RAW RAW RAW RAW.
Using RAW format and Adobe Lightroom you can do 20x what you could back in the good old days of photoshopping each image one by one. You won’t regret it, and you can always just cancel if it doesn’t help somehow.
If you want more info, as well as tons of my photography to download and practice editing while I teach you, I’ve given you guys a discount through Mike, so the course is $100 off for a short window if you use the promo code:
dronelaunchacademy.com/DTphoto
Code: DT100APP
You can watch the commercial, see promo photos as well as everything else covered in the course there^
Good luck out there!
Kennedy Martinez
kennedy@dronethusiast.comKennedy Martinez is a resident writer who joined Dronethusiast at the beginning of 2019. She has years of experience reviewing drones and other tech products. When it comes to flying drones, Kennedy loves the ability to create artistic videos from a unique point of view. Kennedy enjoys researching new drones and other exciting products that are available to consumers which is why she is committed to creating the best buyer's guides for our readers.