Simple Tips to Create Stunning Cinematic Shots With Your Drone
Drones with cameras are becoming more and more common, and we at Dronethusiast couldn’t be happier. It’s wonderful that aerial photography is more cheaper and easier than in any other point in history, and drone shots are a great way to capture your wedding, vacation, or any other event in your life.
However, getting the perfect drone shot is an art just like any other form of photography. Anyone can just point a drone at something and push a button. But today, we’re going to teach you a few tips for taking beautiful, cinematic drone shots that will impress your friends and look great on the mantelpiece. Maybe you’ll even be able to start taking part in drone photography competitions and win a little money!
How To Get Cinematic Shots
Here’s some general rules for capturing drone shots. For this article we will mostly be assuming that you have a professional camera drone of some kind (like a DJI Phantom), but almost all of these tips can also be applied to more simple camera setups
How To Plan Drone Shots
Scuba diving has a mantra: Plan your dive, dive your plan. Stunning drone photography begins with the plan.
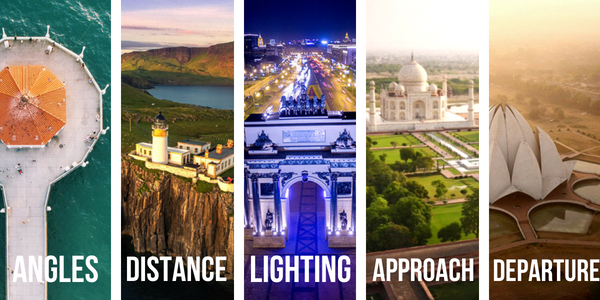
Whether you’re taking photographs for yourself or doing a for-hire project such as a real estate shoot, you need to have a plan for the shoot. Angles, distance, lighting, approach, and departure all need a plan.
In cinematography, all of the shots are taken from what is called a storyboard. The storyboard is a sketch of each scene to be shot in the video. Think of how you would want to document a construction site for a marketing video. You would start with some high altitude general layouts, then many detailed flybys of equipment followed by still shots of workers and equipment at the ground level. Plan the shoot, shoot the plan. The same approach applies to your vacation videos.
A major factor in photography is the time of day you shoot. For artistic scenes, the last hour before sunset is considered “the magic hour.” For direct contrasty lighting, 10 a.m. or 2 p.m. create short shadows. Overcast days leave out shadows, giving you flat lighting. Night shoots can provide you with some unique drone shots, but remember that you need a second person to help keep track of the aircraft.
Your camera choice will dictate how you want to set it up. When looking for a drone camera, think about factors such as ISO, lens angle (wide angle or telephoto), video recording speed, and aspect ratio. There’s even a relatively inexpensive camera called the Mobius that shoots in infrared. Talk about a totally different take on the world!
Different shoots will require different equipment. Working in restricted airspace (if you are permitted) will require an aircraft such as a multirotor while large geographic areas such as an agricultural shoot will require a fixed wing aircraft. To create stunning videos, it is really best to have two sets of eyes working, one to fly the aircraft, the other to watch the First Person View (FPV) feed, operate the camera gimbal, help guide the pilot and maintain situational awareness relative to aircraft or obstacles the pilot may not be able to see.
More and more multirotors are adding FPV capabilities to their airframes. The camera attachments on entry level quadcopters seldom have gimbals, so there is no ability to change the angle of view during the flight. In addition, having the gimbal directly mounted to the airframe without vibration isolation “doughnuts” leads to an effect called “Jello” where the image is shaky. Also, getting the camera set up so the props aren’t included in the video is more difficult.
Airframes and cameras kind of go together. If you want to use a GoPro sized camera, there are many quadcopters on the market designed for that purpose. Getting to the next level such as a small Sony or Canon or Nikon requires a large jump up to either a hexacopter (six rotors) or octacopter (eight rotors).
How To Take Good Drone Shots
The first thing you should think about if you want to take good drone shots is the framing of your image. “Framing” refers to where objects are placed (or “framed”) in the image. The simplest and most effective way to frame something is to use the Rule Of Thirds, in which you visualize your image being divided into nine equal areas and place the object you want viewers to focus on along the lines like so:
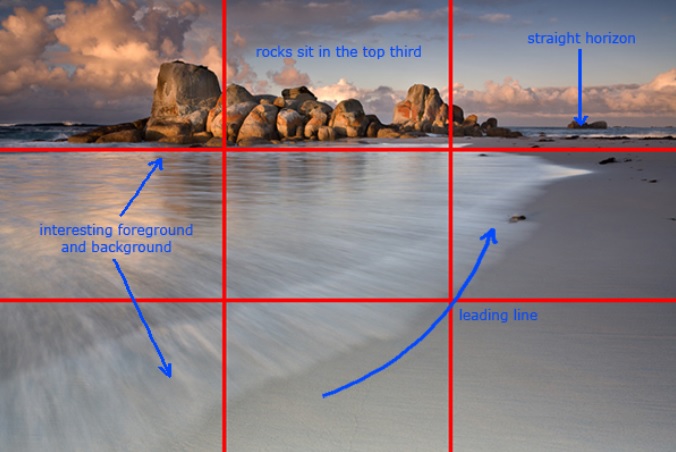
Credit: http://www.leedguid.com.au/
In almost all cases, you do NOT want to put the main focus of your image in the center of the frame. It doesn’t look as visually interesting and doesn’t draw the attention of our eyes in the way that putting something on one of the thirds does.
You should also be aware of the fact that taking video with a drone is a little different from when you use a normal camera. You want to make sure that you’re keeping the drone as steady and as stable as possible and pan slowly over the object of interest. Consider filming in such a way that your main focus starts at the top or bottom of a Rule Of Thirds line in the frame and then moves to the bottom or top as you fly over it.
We’ll talk in the section after next about some more drone shots you can use to make your images pop.
How To Edit Drone Shots
The question of which editing software you should use will be answered by two things: the device you’re editing on and your budget for the shoot.
The Macintosh has had a stellar reputation for visual arts software. Software such as iMovie, Blender and Kdenlive are available for free or at a very low cost. Linux machines can also use Kdenlive.
On the PC side, you can find free programs such as GoPro Studio and HitFilm Express or pricier software like Sony Vegas, FinalCutPro and Lightworks. If you’re looking for some of the most professional editing software available, Adobe Premier Pro CC is a subscription package that runs for $19.99 per month on Amazon right now and you get thousands of dollars worth of software for that monthly price.
Most drone videos are fairly simple, but you’ll mostly likely want to edit in some kind of music and a spoken word audio track that’s explaining what’s going on in the video (or advertising the company you’re making footage for.) Transitions can make a big visual difference, but don’t fall victim to the trap of making visual effects being so busy that the viewer can’t keep up.
Basic Drone Shots Everyone Should Know
Here are a few simple shots that anyone can do with just a little bit of practice. Eventually you’ll start combining these together and creating more complicated drone shots and beautiful video. But these are all really good places to start!
The Fly-By
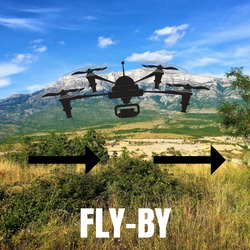
A “Fly-By” is exactly what it sounds like: a type of panning shot where you fly by the subject of the shot. The important thing to consider when framing this shot is how fast your subject is going to move and how fast your drone is going to move. You’ll also want to consider the “tilt” of the drone’s camera – are you going to fly over the subject, beside it while facing up, or beside it while facing down?
This is the most basic drone shot and most other drone shots are going to involve some kind of variation on the Fly-By.
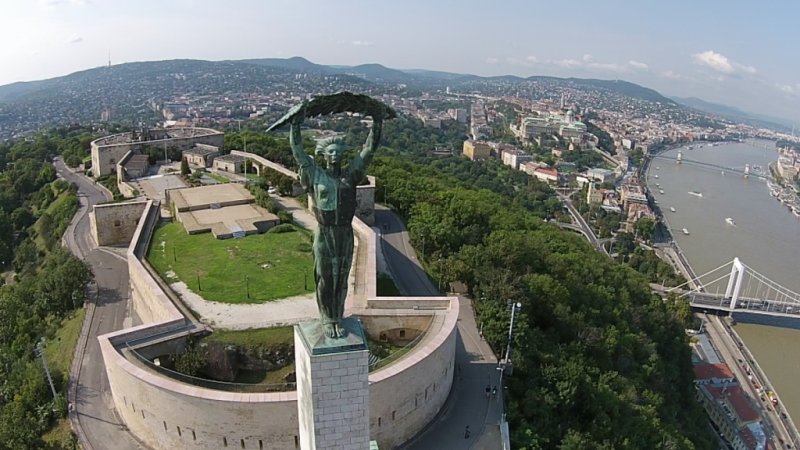
Bird’s Eye View
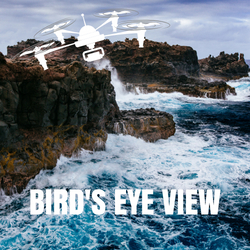
“Bird’s eye view” is a term you’ve almost certainly heard used in relation to photography or videography, but one which you may not necessarily know the meaning of. Basically, this is just a Fly-By shot that’s done high in the air with the camera pointed straight down. This is a shot that’s impossible to achieve with a handheld camera and very easy to do with a drone, so it can add a unique touch to your wedding, vacation, or event photography.
This shot is also known as a “High Pan.”
The Tilt Reveal
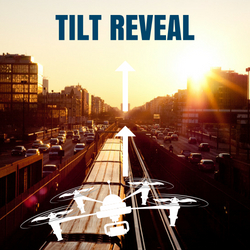
This is a really easy drone shot to do that looks absolutely stunning when done right. Simply point your camera down at the ground, then slowly and smoothly tilt the gimbal upwards to reveal a wide landscape. This is a perfect way to start a professional drone video.
Circular Pan
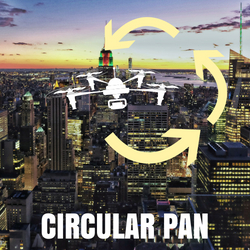
This is a type of Fly-By shot that requires excellent piloting skills and ideal weather conditions (e.g. very little wind.) However, the idea is very simple: a Circular Pan is when you rotate your drone left or right around the subject of the frame while keeping the camera pointed directly at the subject at all times. If you remember the legendary scene in The Avengers where the camera spins continuously around the titular superheroes, that’s basically what you’re going for here.
This drone shot is also sometimes known as an “Object Of Interest” shot.
Conclusion
Hopefully this article has taught you a big more about how to get cinematic shots with your drone camera. A lot of people will get into taking drone pictures and completely ignore the fact that photography is an art form with its own set of rules just like painting, music, or writing.
Now that you know how to capture great drone shots, feel free to share any photos or videos you take in the comments!
Kennedy Martinez
kennedy@dronethusiast.comKennedy Martinez is a resident writer who joined Dronethusiast at the beginning of 2019. She has years of experience reviewing drones and other tech products. When it comes to flying drones, Kennedy loves the ability to create artistic videos from a unique point of view. Kennedy enjoys researching new drones and other exciting products that are available to consumers which is why she is committed to creating the best buyer's guides for our readers.


Nice post guys. Love that you’re teaching that composition is important in aerial video/photography. The drones may keep getting cheaper and easier to fly, but skill and talent still have to be learned. Keep it up!
Great read! Is there a Volume 2 coming out anytime soon?
Hello. Thanks for the feedback. We will do our best to cover this topic more asap. Thaks. Zsolt